Setting up Email in Outlook 2013
Adding an Account
-
Open Oulook 2013
-
Click on the "File" button
-
Select the "Info" tab
-
Click on "Account"
-
Select "Add Account"
Configuring Email Account
-
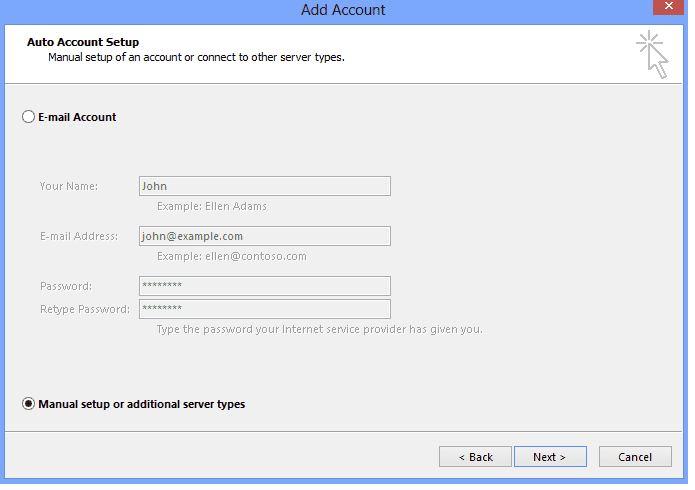
Select "Manual setup or additional server types"
-
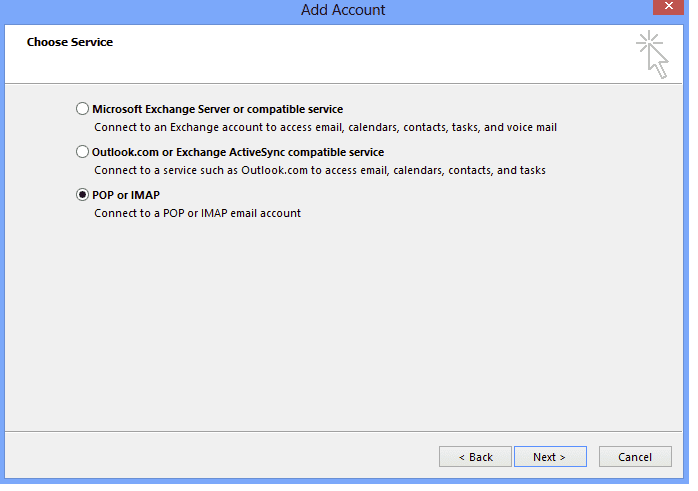
Choose "POP or IMAP".
-
Click "Next"
-
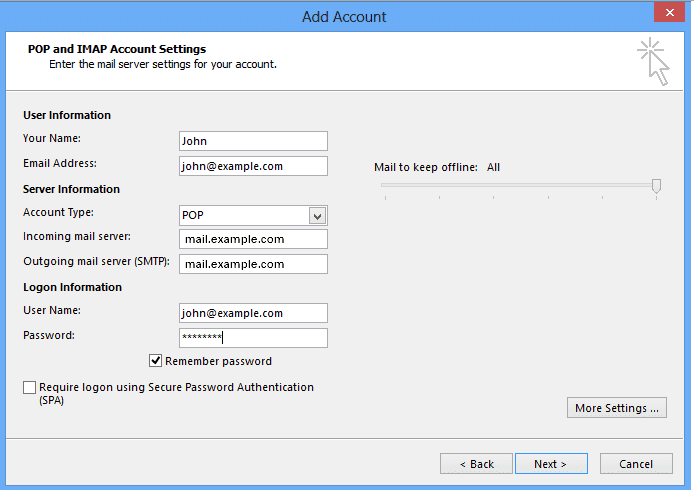
Fill in the fields
Your Name: The name that will appear when you send an email.
Email Address: The complete email address, e.g., john@example.com.
Account Type: POP.
Incoming Mail Server: mail.example.com.
Outgoing Mail Server (SMTP): mail.example.com.
User Name: The full email address, e.g., john@example.com.
Password: The password you have set up through cPanel or Plesk when creating this email account.
Remember Password: We recommend checking this option.
Require logon using Secure Password Authentication (SPA): We recommend not checking this option.
Advanced Settings
-
Select More Settings
-
Select the Outgoing Server tab
-
Check the box My outgoing server (SMTP) requires authentication
-
Select Use the same settings as my incoming mail server
-
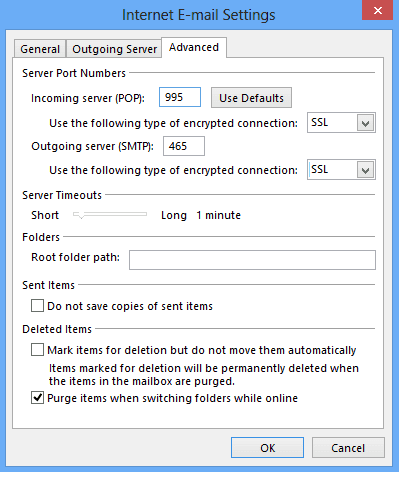
Select Advanced
-
Fill in the following in their respective fields
Incoming Server (POP Port): 110 ** Use the following type of encrypted connection (Incoming): Optional. If enabled, change the Incoming Server (POP Port) to 995.
Outgoing Server (SMTP Port): 587
Use the following type of encrypted connection (Outgoing): Optional. If enabled, change the Outgoing Server (SMTP Port) to 465.
-
Select OK
-
Select Next


