In this article, we will guide you through the process of performing a backup restore using JetBackup 5 in cPanel.
Video Tutorial
Getting Started
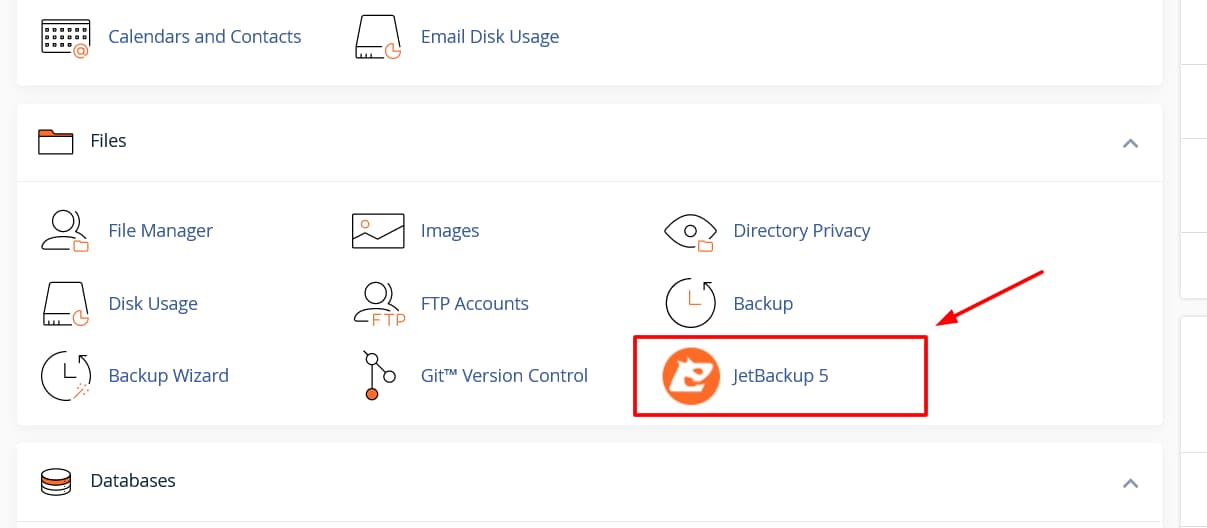
After logging in to our cPanel, we select JetBackup 5 from the Files category.
Warning
In case we have a dynamic website or a well-known CMS (e.g., WordPress, Joomla, Opencart), for a full restore, it should be performed on both our files and database.
Locating Files
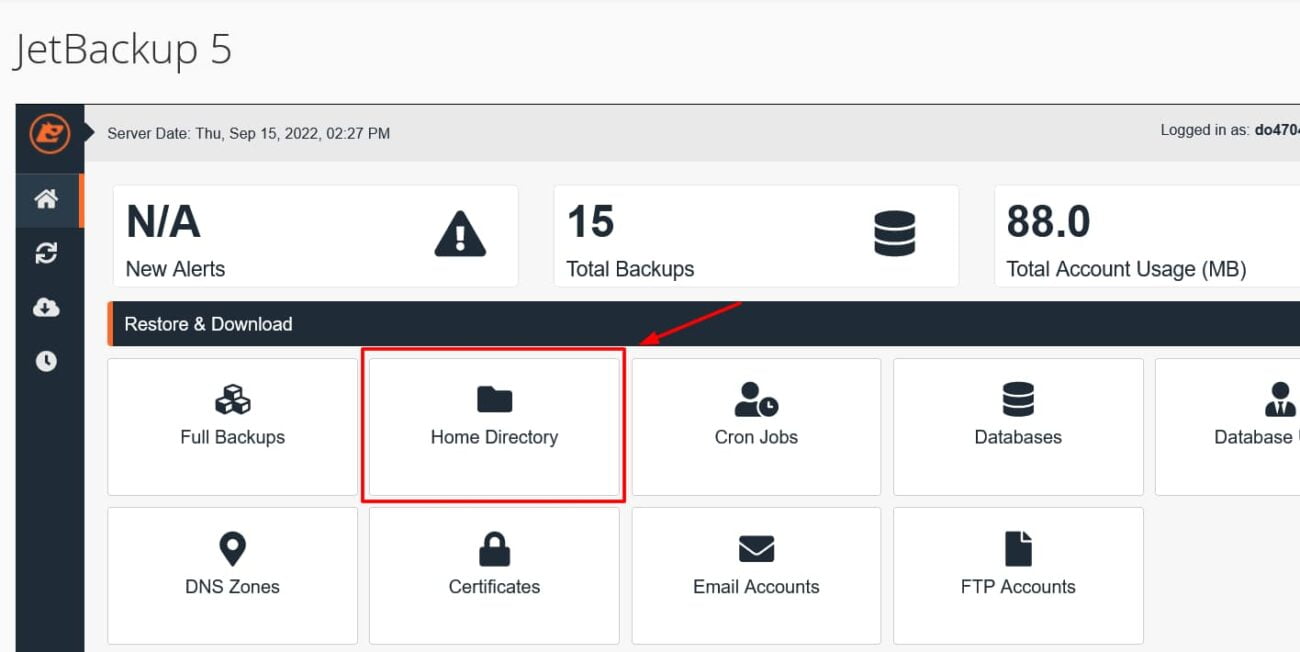
To start with our files, we will select the "Home Directory" icon.
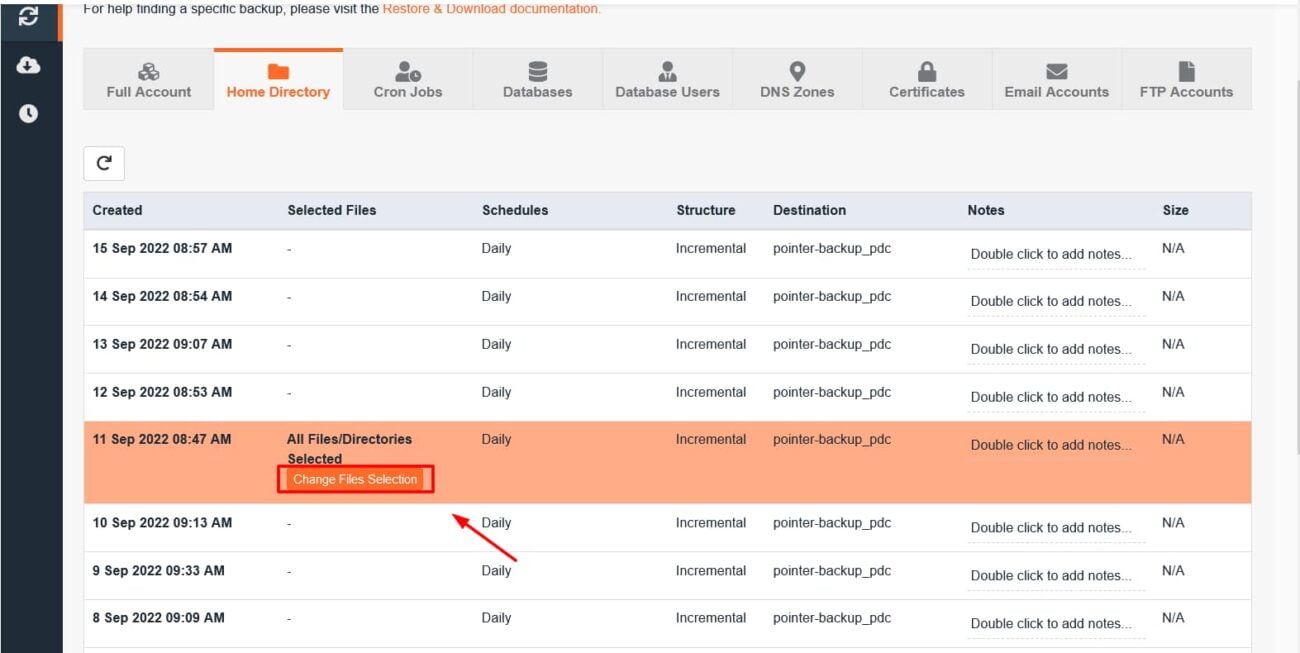
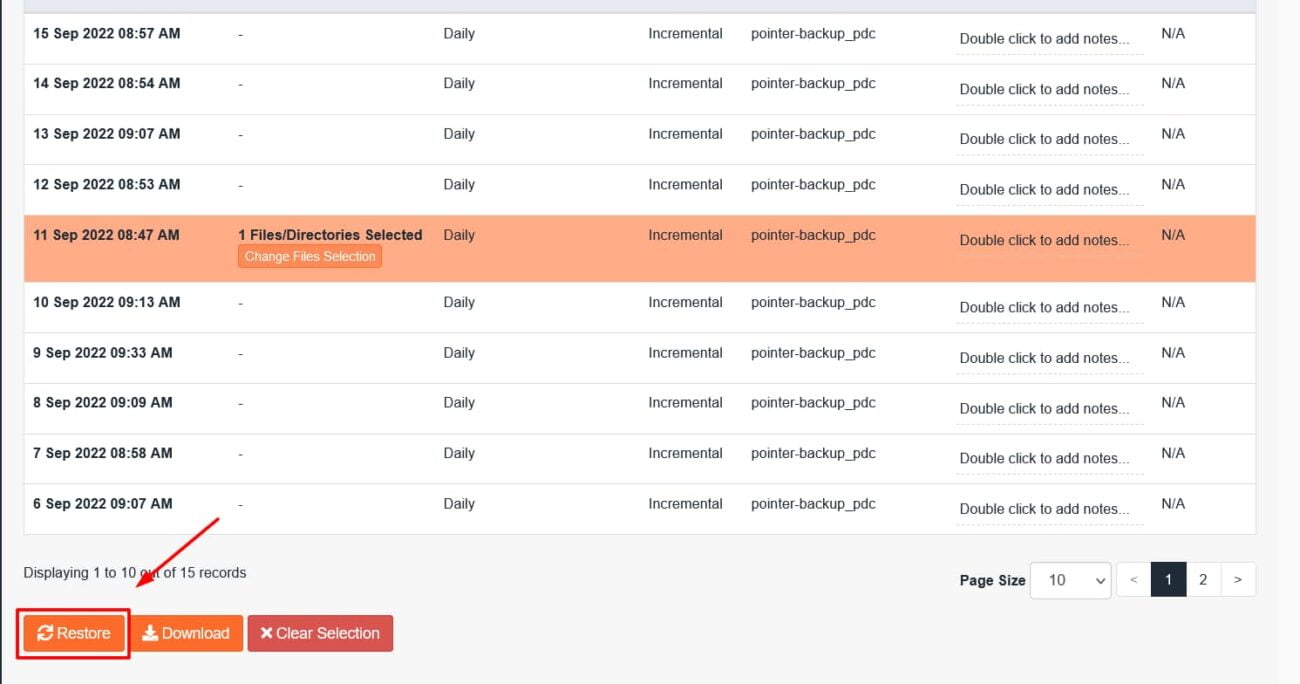
We choose the desired date and press the "Change Files Selection" button.
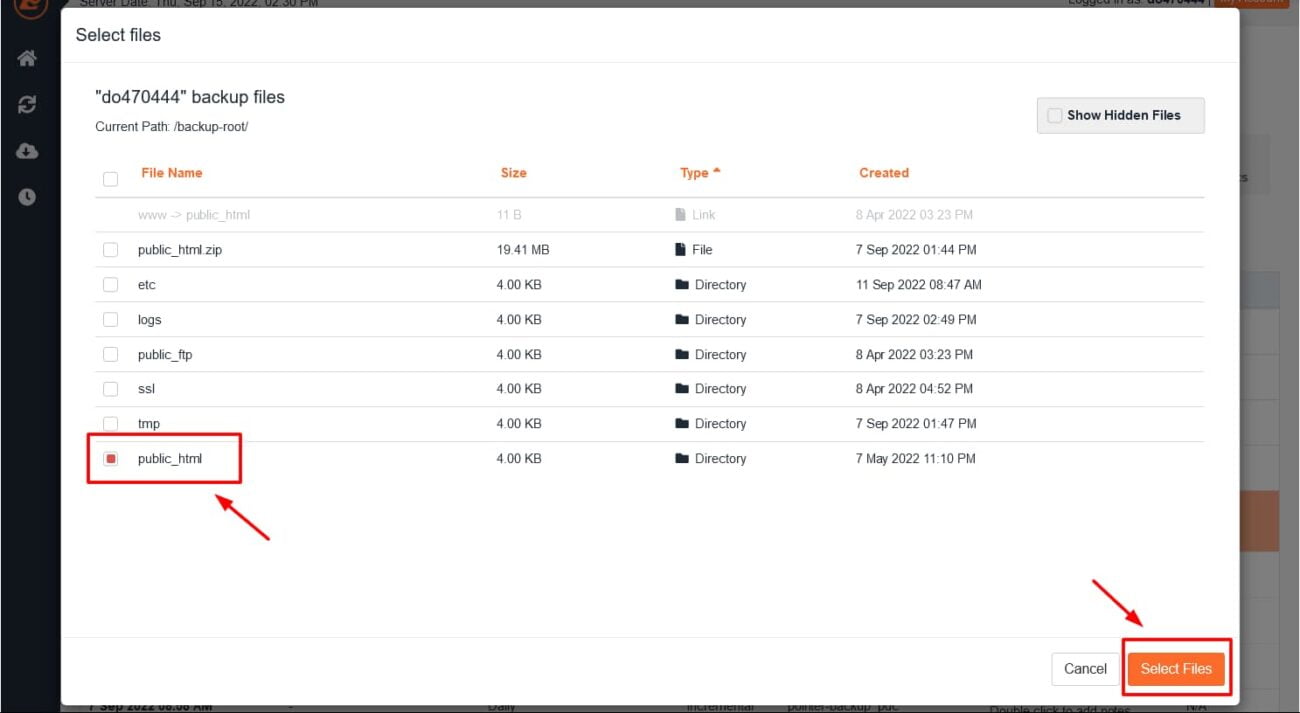
In the next selection, we need to choose the folder where the files of our website are located. Typically, for the main domain name, the folder is "public_html". Then, we press the "Select Files" button at the bottom right of our screen.
File Restoration
We select the "Restore" button, and in the next prompt, we choose "Restore Selected Items".
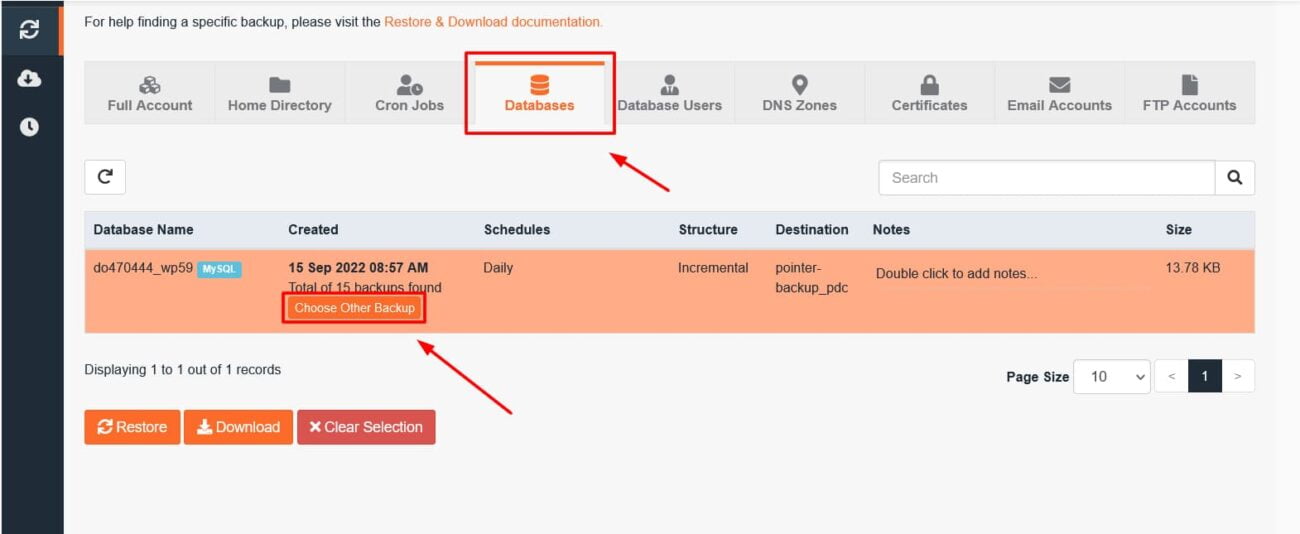
For our database, we will select the "Databases" tab. Then, we choose our database, and next, we click on the "Choose Other Backup" button.
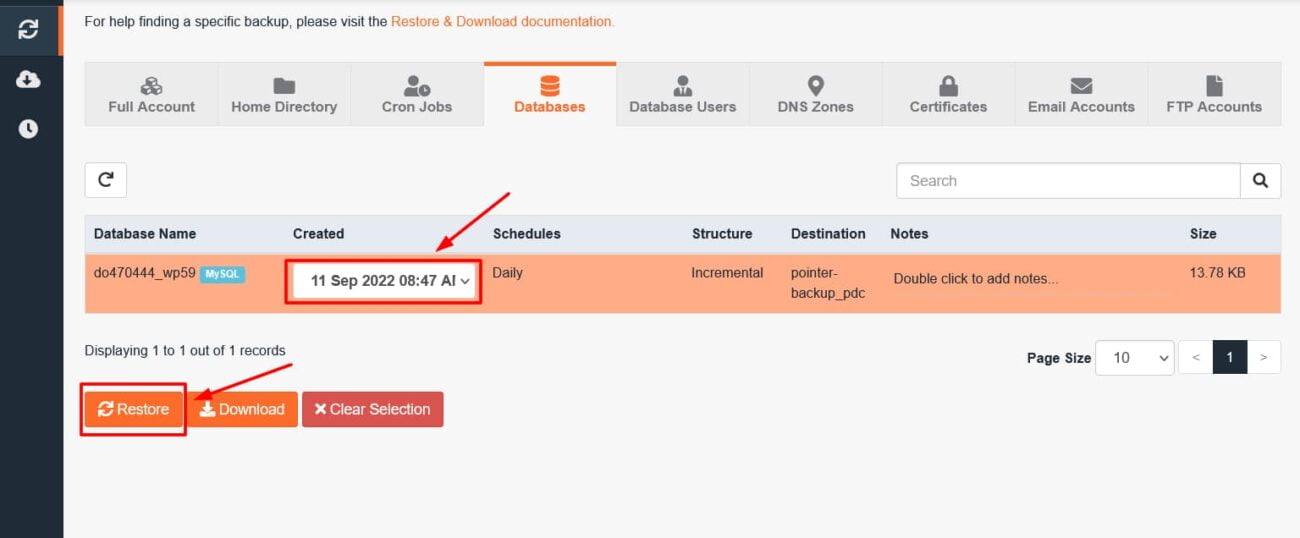
Finally, we select the date for the restoration, followed by the "Restore" button, and in the subsequent prompt, we choose "Restore Selected Items".
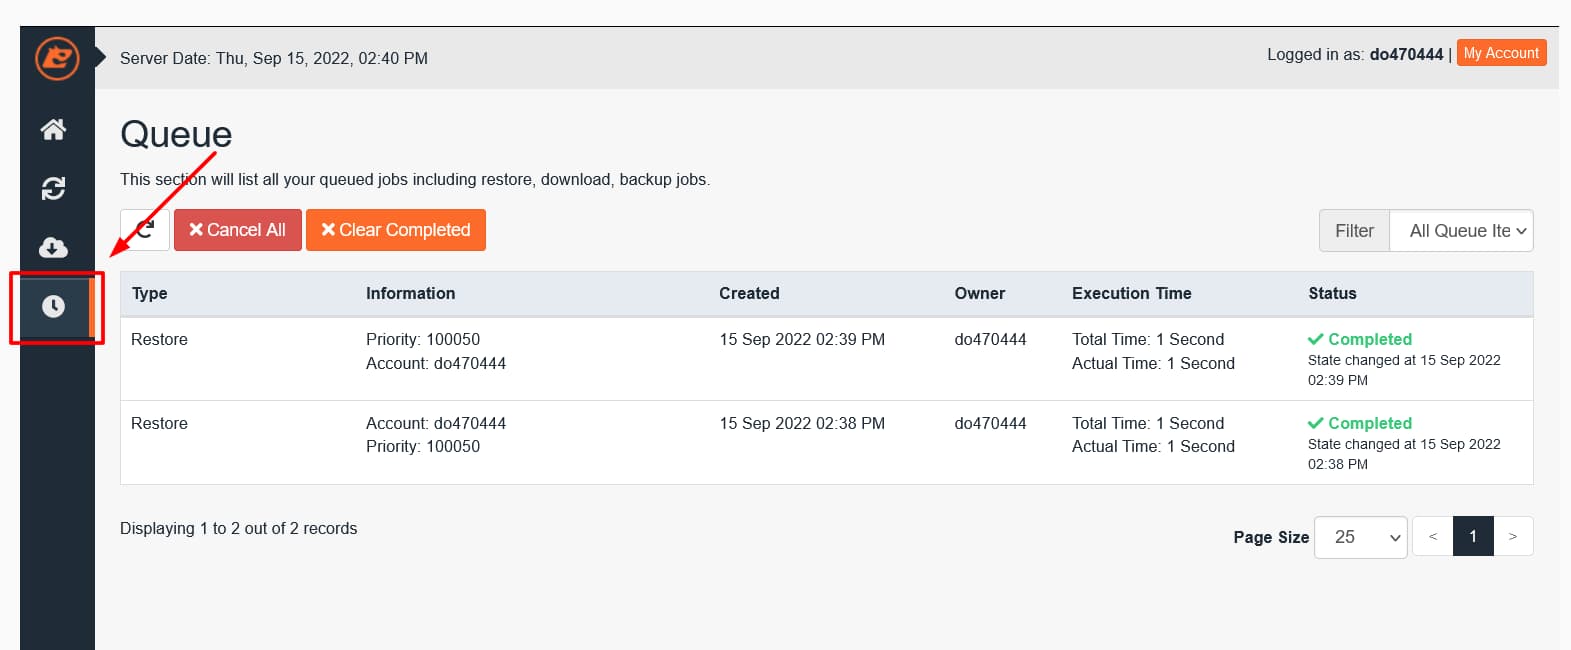
To confirm the successful completion of the file and database restoration, we can check it through the "Queue" button.